
 |
| A table. Not my table, but it illustrates the point... It's even an Eastern front table... ish. |
All three of the Bunker3030 authors are putting tables together. I've opted for an Eastern front table. As I have plans for an Eastern front army as my next FoW force it seems like a sensible choice. Beyond that I reckoned it would be one of the cheaper and easier tables to organise and both time and money are always important factors for a hobby!
The table will consist of a Games Workshop Battlemat, a Kerr & King Eastern Front Village, some ready made trees and some home made roads. I'll also be adding some wheat fields and hopefully some haystacks made from door mats.
Part 1 focuses on the fantastic Kerr and King Eastern Front village buildings.

The above image is taken from the Kerr and King website. For £45.00 you can order the KK- 242 City in a Box: Eastern Front - Karelian Village. This comes with 5 buildings in a similar style to the above; one double story with balcony, one long single story, one square large with stair entrance and 2 more agricultural log huts with some sculpted damage to the roof.
Sadly, the models I got needed quite a bit of work and wont look as good as those pictured on the Kerr and King website. The moulds are obviously showing some signs of wear and as a result the models coming out of the moulds at the moment are full of flash and filled in detail. The problem is with the soft silicon tools used and the very fine detail of the sculpted wood panels. On my samples there was a lot of the tool material between the tight gaps in the wood panel. This means that the next models coming out of the mould would feature even less detail.
 |
| Filled in detail: The gaps between the planks on the roof parts were obscured on most buildings. |
I did what I could with a clean up and some green stuff filling. It's very difficult to fix some of the extra resin between the wood panelling. So I didn't. Instead, I hoped that the models would look reasonable once dry brushed.
Here is how he buildings looked prior to painting. At this point they have had some green stuff used to fill the worst of the voids and short moulding areas and a simple wash in warm water and washing up liquid.


To paint them I simply undercoated in black and then drybrushed through a series of Vallejo Flat Earth, Flat Earth mixed with Vallejo Green Ochre 50:50 and finally a very light dry brush of Games Workshop Codex Grey. The grey might not seem particularly obvious for painting wood panels but it's quite a natural shade for wood and certainly for wood exposed to the elements. Trees are rarely pure brown.


Detail was picked out in a mixture of colours. I kept to pastel shades. I didn't want any bright red or blue window frames.
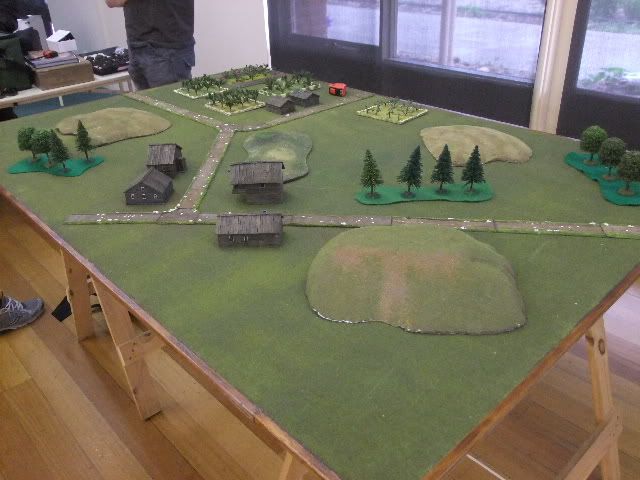
I'm happy with the end result. The poor moulding quality didn't really impact on the models when fully painted. I don't think they will come under a great deal of scrutiny on the table top and they certainly have plenty of 3 feet appeal. (as in... they look just perfect when viewed from arms length!). Here's some shots from yesterday's action at the club. Turns out they made good hiding spots for Panzer IV/70's and Panthers!


More on the table soon. Thanks for swinging by!
Nice stuff, thanks for pointing it out.
ReplyDeleteAlways enjoy reading your blog, good tips on painting wood!
...Brax from sixtwentyeight